Building the Chesapeake Bay Flattie
Apprentice Level 1 Kit by Midwest Products
Chapter 1: Assembling the Keel and Bulkheads
Before beginning to build a ship model kit, you should make sure you have a few tools available for use in construction. There are many tools available for ship model building, but only a few are absolutely necessary to build a kit like Midwest Products’ Chesapeake Bay Flattie. See our Ship Model Tools page for a basic list of tools we’ll use to construct the model. We’ve kept the list simple, with tools available at most hardware stores. If we use a special tool in the build, we’ll also tell you what simple tool could be used to achieve similar results.
Step 1: Examining the Kit Contents
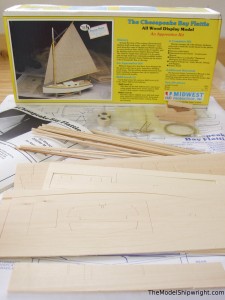
As with any wood model kit, it’s always a good idea to familiarize yourself with the contents of the kit (see figure 1 – click on image for full size) before starting. The instruction manual provides a list of kit contents that you can use to match up the various sheets of die-cut parts, pieces of strip wood, dowels, pre-shaped parts, and fittings with their intended use. Not only does this make it easier to find parts during the construction process, and help prevent using the wrong part, if there is a part missing, you can order a replacement now, rather than being right in the middle of a construction step, and finding it’s not there.
Step 2: Removing the Die-cut Parts
Before removing die-cut parts from the parts sheets, it’s a good idea to label them with the part number. I do this as part of the process of familiarizing myself with the kit contents. You can use a pencil, or as I prefer, lightly etch the part number into the surface of the part with a hobby knife. This way, if the part ends up in a visible place, just a touch of light sanding will remove all traces. A pencil can be difficult to erase from wood, difficult to cover with paint, and can leave an indentation that must be filled with wood putty if it’s in a visible spot.
Do not attempt to just push the die-cut parts out of their master sheets. Use a hobby knife to finish the die-cuts. Make sure the knife blade is sharp, and change it often. A dull blade will tear the wood and damage the part. Replacement blades are cheap if you buy a quantity of them. Keep a coffee can on your workbench to discard used blades. Don’t worry about cutting out the small slots in the parts at this point, just cut across that area along the perimeter of the part free the whole part from the master sheet.
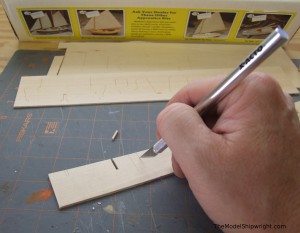
Once the whole part has been freed, it will be easier to remove the small slots in the parts (see figure 2a). When cutting the long side of the slot, cut from the edge of the part toward the middle to prevent tearing out the wood at the edge. When cutting the short side of the slot, place the point of the blade in the corner, aligned with the embossed line, and push it down into the wood rather than making a cutting motion, which may cause the part to split.
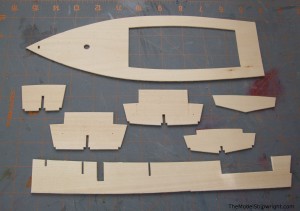
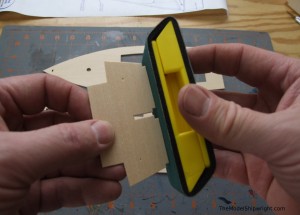
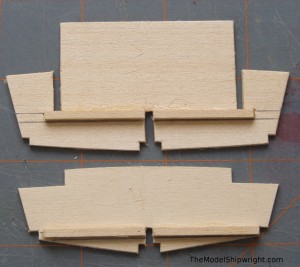
At this point, you need to free the keel, bulkheads F1, F2, F3, F4; and the transom. After each hull part has been cut out, lightly sand the edges to remove any rough spots (see figure 2b). If you don’t have a sanding block, wrap a piece of sandpaper around a flat scrap of wood and attach it with thumbtacks on the top side. Remember the key word here is “lightly.” You don’t want to change the shape of the part, just remove any imperfections in the edges. The parts are shown full size on plan 1 if you are not sure whether something is an imperfection, or intended to be part of the shape of the piece. When you are finished, you will have all the parts in figure 2c. I went ahead and cut the deck out, as we will use it early in the next chapter.
Step 3 Adding Bulkhead Braces
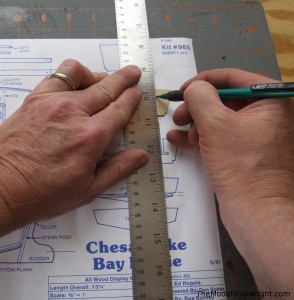
Bulkheads F2, F3, and F4 need to have 3/32” strip wood braces attached to them to help in later assembly steps. Lay each part over the full size drawing on sheet 1, and use a metal straight edge to copy the extended lines on the plan to the part (figure 3a).
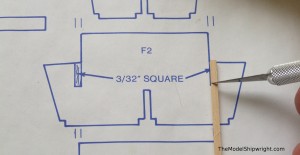
The drawings on the plan can be used to measure the size of the braces. The easiest way is to lay the strip wood on the plan and score it with your hobby knife to the correct size (figure 3b). Remove it from the plan and rolling the strip wood, score all four sides at your mark before cutting it completely through.
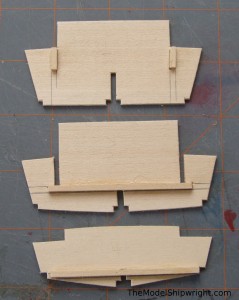
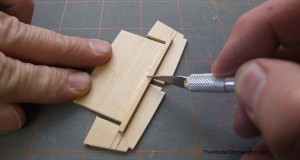
Use your pencil marks to glue the braces in the proper positions. Make sure that the braces on F3 and F4 are centered on the bulkhead. You will notice that the braces on F3 and F4 cross the slots you cut into the bottom of each piece (figure 3c). Ignore this when gluing the braces on. If you try to cut it out before gluing, you not only have to get the braces in the right spot on the bulkhead, but you have to get each aligned with the other half. After the glue has dried, use your hobby knife to remove the spot on the F3 and F4 braces that blocks the slot (figure 3d) so that the final result looks like figure 3e.
Step 4 Assembling the Keel and Bulkheads
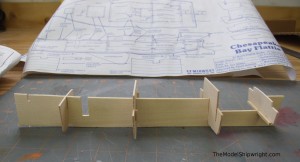
Before gluing the keel and bulkheads, “dry” fit them (figure 4a) to make sure everything fits where it should. Use the side view on sheet 1 to make sure the bulkhead tops align where they should be. F1 should be flush with the top of the keel, while the other bulkheads protrude above it. Also note on the plan the location of the bulkhead braces. The braces on F2 and F3 are on the aft side, while on F4, the brace is on the forward side, facing the brace on F3.
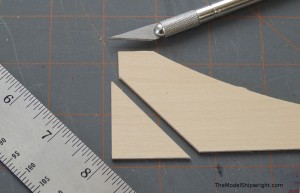
It is very important that the bulkheads are glued so that they are at a 90-degree angle to the keel. If you don’t have a miniature carpenter’s square, you can make one by cutting off the corner of the master sheet that contained the deck, F4 and the transom (figure 4b).
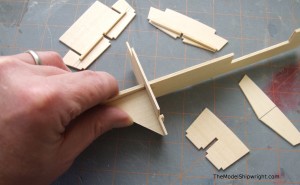
Using your square to make sure you have a proper 90-degree angle (see figure 4c), glue each bulkhead in its slot. Start with bulkhead F3 and work your way forward and aft so you have better access to each bulkhead when gluing them in place.
Step 5: Adding the Cabin Floor
The 2 1/32” x 2 1/2” x 1/16” inch cabin floor is a pre-cut part, not one of the die-cut parts.
This doesn’t mean it will be sized perfectly. Test fit it between F3 and F4 before gluing (see figure 5). Make sure the wood grain on the cabin floor is aligned with the keel. You may have to sand it slightly to get it to fit. When you have a satisfactory fit, apply glue to the tops of the bulkhead braces, center the cabin floor over them, and press it in place.
Step 6: Gluing the Transom
Gluing the transom in place is probably the most difficult step in this sequence, as it must be aligned by hand, so take your time.
First, lay the transom over the drawing of it on sheet 1. Using your metal straightedge and the extended lines on the plan, draw the center-line on the transom. Apply glue to the rear surface of the keel where the transom contacts it. Align the center-line you drew with the keel, and press the transom into the glue.
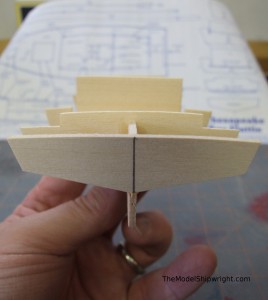
The difficult part is you have to make sure the transom is at a 90-degree angle to the keel, while also making sure it is aligned with the other bulkheads. Sight down the keel (figure 6a) to make sure the transom lines up evenly with the other bulkheads.
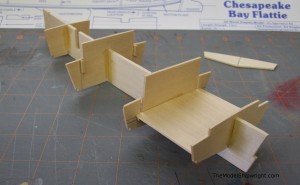
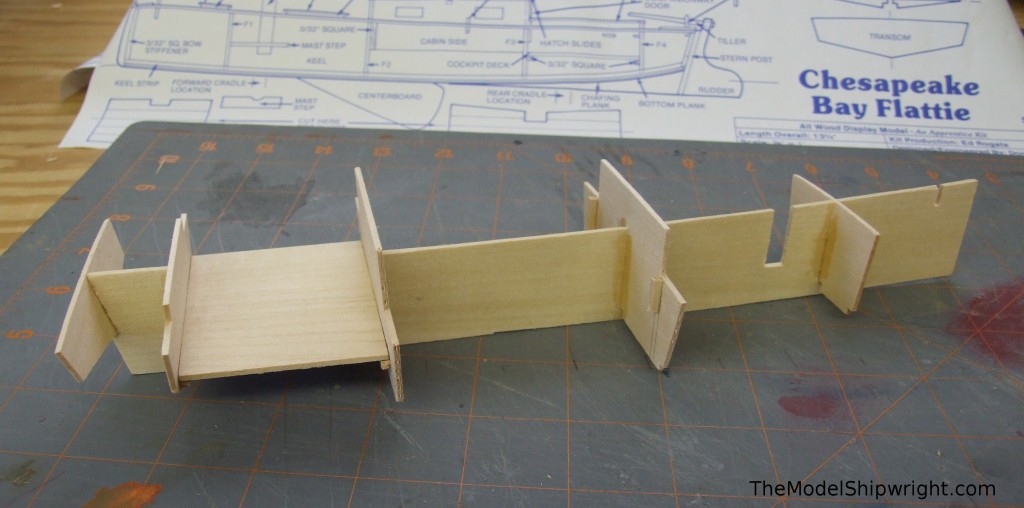
As in figure 6b, we now have a complete skeleton of the hull of our Chesapeake Bay Flattie, ready for the addition of the deck, which we will do in Chapter 2.
Back to Chesapeake Bay Flattie Introduction
Chapter 2: The Deck
Chapter 3: The Mast Step and Bow Stiffeners
Chapter 4: Keel and Chine Strips
Chapter 5: Installing the Cabin
Chapter 6: Planking the Hull
Would this be the very best 1st Model To Start out with ?
It’s impossible to say for sure if it’s the very best model for you, but the instructions are very well written, and the construction is very simple due to the flat sides and bottom of the hull.
Thank you for your excellent response 1 more question is there Ship ” Building Instruction Books ” available on the market with this type of excellent information to assist me in construction of wooden model ships ?
[…] Chapter 1: Assembling the Keel and BulkheadsChapter 2: The DeckChapter 3: The Mast Step and Bow StiffenersChapter 4: Keel and Chine StripsChapter 5: Installing the Cabin […]
I received my kit without any instruction sheets and would like to receive a copy of them.
You may be able to find a incomplete kit for sale on eBay that has instructions. If you asked them to just ship the plans and instructions it would be a lot less than shipping the whole box.