Building the Chesapeake Bay Flattie
Apprentice Level 1 Kit by Midwest Products
Chapter 4: Adding Keel and Chine Strips
Next up in our construction of the Midwest Products Chesapeake Bay Flattie ship model kit is to create a supporting surface for the bottom and side planks by adding keel and chine strips. The keel strips lie along the keel to keep the bottom planking from sagging between the bulkheads. The chine strips run along the edge where the bottom and sides of the boat meet.
Boats are often referred to as “hard-chine” when the intersection of bottom and sides is at a sharp angle such as on the Chesapeake Bay Flattie. While many old-salts will argue that a hard-chine boat will handle rough in heavy seas, this design feature makes it easier for backyard boatbuilders to create a work boat inexpensively. And, as the Chesapeake Bay Flattie and other boats of her type were not designed for the open sea, but rather the shallow rivers, streams, and estuaries of the Chesapeake Bay, it was not considered a design fault. And, just as it simplified boatbuilding for Chesapeake Bay mariners, it also greatly simplifies construction of our Chesapeake Bay Flattie model.
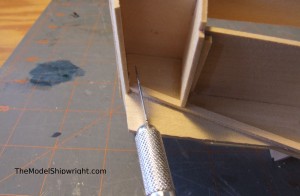
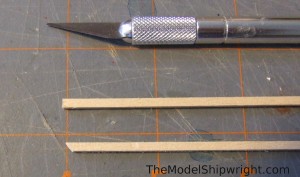
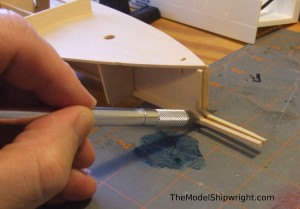
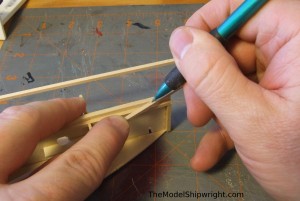
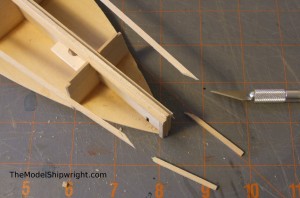
First up, we begin installing the keel strips by placing a 3/32” x 3/32” strip into the slot in bulkhead F4 and angling it to meet the bottom of the transom. Using a hobby knife as in Figure 21, mark the angle the strip will need to be cut to meet the transom flush where it butts against it. Figure 22 shows the two keel strips, the top one with the original square end and the bottom one with the bevel cut in where it will join the transom.
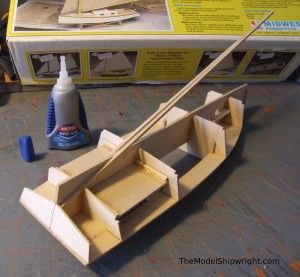
When adding elements to the hull framework at this stage of construction it is best to do both sides at the same time to avoid twisting the hull out of shape, so I glued both keel strips on at the same time. In Figure23 I have added a drop of glue to the slots in bulkhead F4 and to the beveled ends of the keel strips, and put the strips in place. The butt joint with the transom will take a lot of stress as the keel strips are bent to shape, so let this joint set up before proceeding.
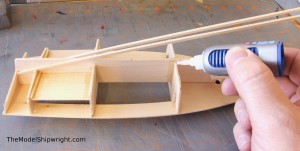
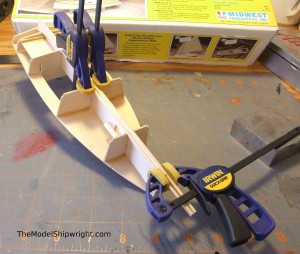
In Figure 24 I am applying drops of glue to the other slots in the bulkheads before bending the keel strips into them. Work carefully to avoid breaking the keel strips, slowly bending them into the glue-filled slots and they will take on a “fair curve” to create the shape of the bottom of the ship. In Figure 25 I used micro bar clamps to hold the keel strips in place over bulkhead F2 and at the bow (don’t glue them at the bow just yet). Do not use clamps between the bulkheads, as they will force the keel strips out of their “fair” curve. While the keel strips will form a fair curve from the transom to bulkhead F2, from bulkhead F2 to the bow stiffener the keel strips should be straight, ending up against the bottom of the bow stiffener. Once you are sure the strips are even at the bow, apply a touch of thin CA glue to the top edge where they meet the bow, and the glue will flow into the joint by capillary action.
Once the glue has set, use your hobby knife to trim the keel strips off even with the front of the keel as shown in Figure 26. At this point you can go back along the joint between keel and keel strips, adding a thin bead thin CA to join the strips to the keel.
The chine strips follow a similar assembly to the keel strips, however, these strips will be bent in two directions, so care is required to place them accurately.
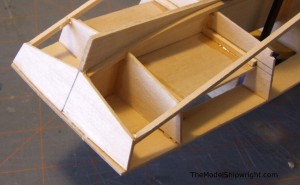
In Figure 27, the chine strips have been beveled as the keel strips were, but when marking the cut with the hobby knife, mark the angle the strip meets both the side and the bottom of the transom. Cut this bevel carefully so that you have a good mating surface to glue the chine strip to the transom. As with the keel strips, glue the chine strips to the transom and bulkhead F4, allowing that joint to set up before bending the strips.
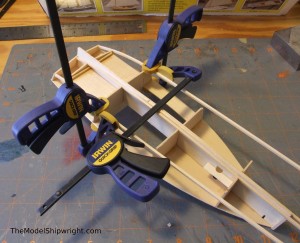
After the the transom and bulkhead F4 joints have set, add drops of thick slow-cure CA glue to the notches in F3 and carefully bend the strips into place. In Figure 28, I have used my micro bar clamps on both the horizontal and vertical axes where the strips meet bulkhead F3. Make sure the pads of the clamps are resting on the bulkhead to prevent adding bends to the chine strips that would affect the fair curve you are trying to create. As I only have four micro clamps, I had to let the joint set at F3 before gluing the strips to bulkhead F2. I didn’t glue them into bulkhead F1 at this point. Also, for now, do not glue the strips to the bow.
Once the chine strips are glued in place, bend one over the keel so its outside edge is even with the front of the keel, as in Figure 29. Draw a pencil line where the outer edge of the keel strip lies under the chine strip. Repeat this step with the other side.
Use your hobby knife or razor saw to cut along these pencil lines so that the ends of the chine strips are beveled as in Figure 30. Be careful to cut make these cuts square with the vertical axis of the chine strip so that they are not twisted when they are later glued to the keel strips.
Finally, check the fit of the beveled chine strips to the keel strips to ensure the ends are even when viewed from the bottom and front. This is a very visible part of the finished model, and any inaccuracy here will create an unfair curve that will be hard to correct later. Use sand paper to touch up the bevels until you get a good, even fit.
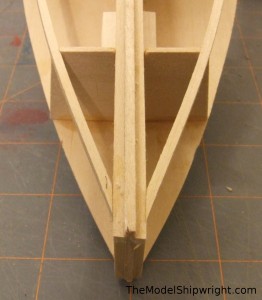
Finally, glue the chine strips into the notches in bulkhead F1 and the outside edge of the keel strip as shown in Figure 31.
While our Chesapeake Bay Flattie still looks like a skeleton at this point, very soon it will begin to look like a real boat. Up next, adding the cabin, then on to the planking!
Back to Chesapeake Bay Flattie Introduction
Back to Chapter 1: Assembling the Keel and Bulkheads
Back to Chapter 2: The Deck
Back to Chapter 3: The Mast Step and Bow Stiffeners
Chapter 5: Installing the Cabin
Chapter 6: Planking the Hull
[…] 1: Assembling the Keel and BulkheadsChapter 2: The DeckChapter 3: The Mast Step and Bow StiffenersChapter 4: Keel and Chine StripsChapter 5: Installing the […]